How to Install Lingmo OS without CD or USB: A Step-by-Step Guide
This article is a guide for installing Lingmo OS without CD and USB.
Before following any of these steps, download the ISO image from https://lingmo.org/index.php/download-lingmo-os.
1 Preparation
1.1 Check the boot mode
- Press
Win+Rkeys to start the Run dialog - In the Run dialog type
powershell "start cmd -Verb runAs"and press Enter to open an elevated command prompt - Type
bcdedit /enum | find "winload"and then press Enter. - If it shows
winload.efi, then the boot mode is UEFI.
If it showswinload.exe, then the boot mode is BIOS.
1.2 Create the disk partition
- Press
Win+Rkeys to start the Run dialog - In the Run dialog type
diskmgmt.mscand press Enter to open disk management. - Right click the partition you want to shrink, and then select Shrink Volume.
Note:If the file system isn't NTFS, you can't shrink the partition.
If there is some virtual memory on the partition, the Shrink Volume may still be greyed out.
- Enter the size you want to shrink(at least 14336MB), and then click Shrink.
- Right click the unallocated region on your hard disk, and then select New Simple Volume.
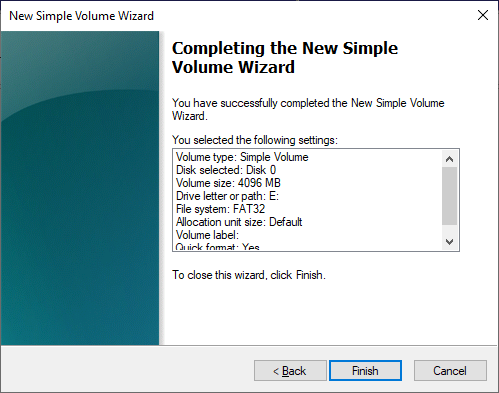
- Change the simple volume size to 4096MB, and then click Next.
- Accept the default drive letter, and then click Next.
- In the Format Partition dialog box, change the file system to FAT32.
- Review your choices, and then select Finish.

2 Create the live environment
2.1 Copy the contents
Use 7-Zip to open the ISO image and extract all the files and folders to the newly created partition.
2.2 Install GRUB2(For UEFI)
- Download GRUB 2.06.
Note:GRUB 2.12 won't work properly on Windows.
- Extract the
grub-2.06-for-windowsfolder ingrub-2.06-for-windows.zipto the newly created partition. - Open an elevated command prompt using steps in 1.1.
- Use these commands to install GRUB2.
Replace E: with the newly created partition in the following commands.
For UEFI:
cmd
cd /d E:\grub-2.06-for-windows
grub-install --target=x86_64-efi --efi-directory=E: --boot-directory=E:\boot
For BIOS:
cmd
cd /d E:\grub-2.06-for-windows
grub-install --target=i386-pc --boot-directory=E:\boot \\.\PHYSICALDRIVE0
3 Install Lingmo OS
3.1 Pre-installation
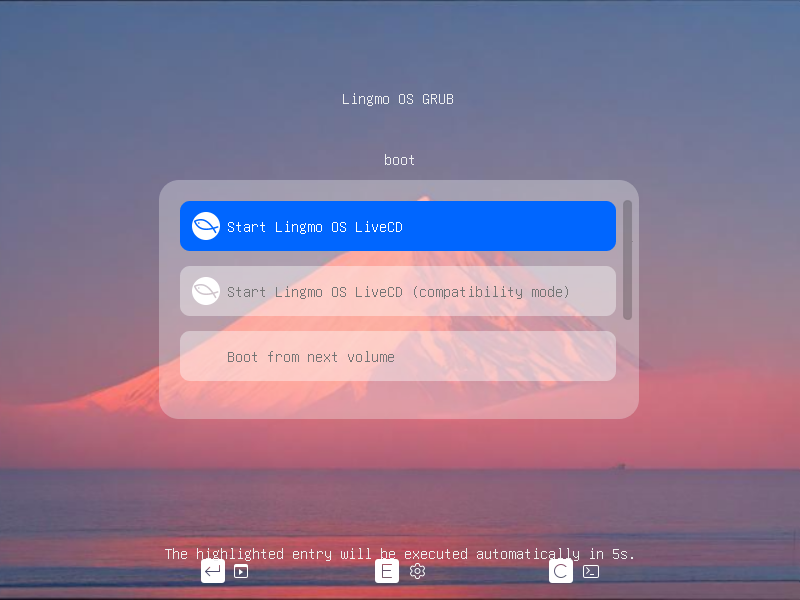
- Restart the computer.

- In the Login Screen type
liveand click Login. - Click the Install Lingmo shortcut icon from applications list(click the Launcher icon on the dock to show applications list)
3.2 Installation
- The first few pages in the installer will ask you to select language, choose your location, and select a keyboard layout.
- Once done first 3 steps, it goes into Partitions, and then choose Manual partitioning.
- Click on the free space, and click Create button. EXT4 filesystem is recommended.
- Change the mount point to / and click OK.
- For UEFI, click on the first partition and click Edit, and change the mount point to /boot/efi.
- Click Next.
- Create a user, set password and hostname(computer name).
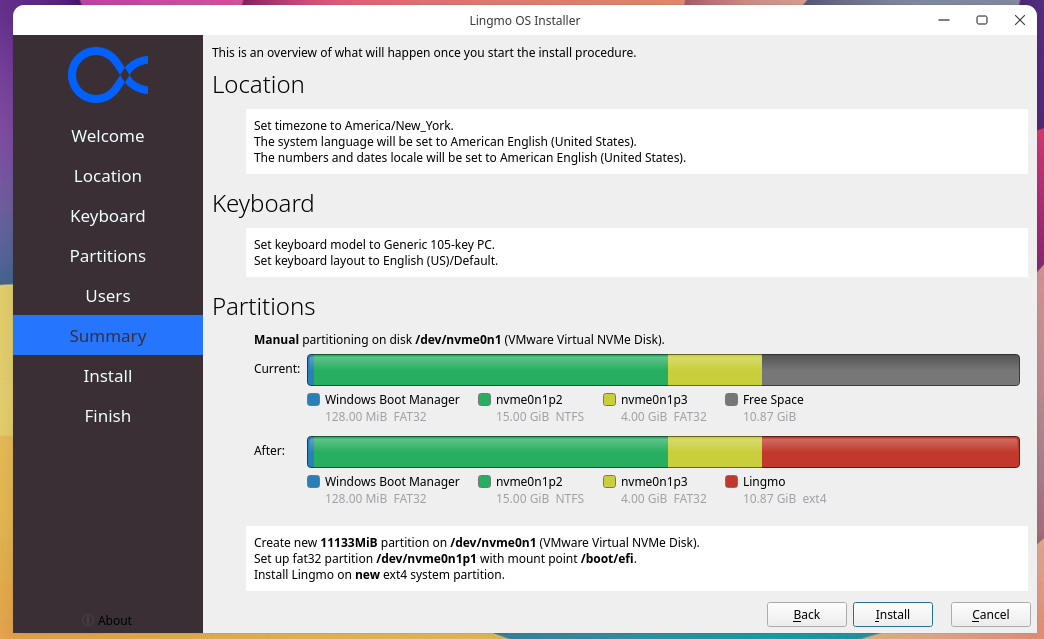
- Finally, it will show a summary overview of what you did. If everything is OK, click Install.

- The installation process can take a few minutes. When it is done successfully, you can restart your computer to the newly installed Lingmo OS.
